Setting up OpenHab
Warnings
In this chapter:
- I have chosen to download the latest nigth build, as OpenHab 2 is in a beta phase,
- I have decided to use the online version of OpenHab.
Installing OpenHab
To do this :
- Go to the following site (it contains the latest version) :
(https://openhab.ci.cloudbees.com/job/openHAB-Distribution/). - Click on the link :
openhab-online-2.0.0-SNAPSHOT.zip, to download it in your "download" folder. - Open the terminal window.
- Choose a folder name to host your install. The directory will be created in your home folder. Be aware that the path to this folder, and the name of the folder itself, must not contain any space character in order to prevent this classical cause of crash. The name chosen here is
OpenHab. Use the
lscommand in order to check that your directory does not exists yet.cal:~ callas$ ls Desktop Movies Documents Music Downloads Pictures Library PublicMove the downloaded file. Assuming that you have downloaded the file in your download folder, the command will be :
cal:~ admin$ mv Downloads/openhab-online-2 OpenHabUse the "ls" command in order to check that your directory exists now.
cal:~ callas$ ls
Desktop            Movies    Public
Documents        Music
Downloads        OpenHab
Library            Pictures
Tweaking the install
We have great chances that the standard OpenHab port, the port 80, is already used by some Mac Os tools or software. To avoid any issue, we will change the default port used in OpenHab install.
Move inside the OpenHab folder using the "cd" command.
cal:~ callas$ cd OpenHab/Use the "ls" command in order to check what is inside.
cal:OpenHab admin$ ls
LICENSE.TXT    conf        start.bat    start_debug.bat    userdata
addons        runtime        start.sh    start_debug.sh
Edit the start batch (start.sh), using the text editor
nanocal:OpenHab admin$ nano start.shYour screen should display the following.
GNU nano 2.0.6                    File: start.sh
#!/bin/sh

echo Launching the openHAB runtime...

DIRNAME=`dirname "$0"`
exec "${DIRNAME}/runtime/karaf/bin/karaf" "${@}"


                                        [ Read 6 lines ]
^G Get Help     ^O WriteOut     ^R Read File    ^Y Prev Page    ^K Cut Text     ^C Cur Pos
^X Exit         ^J Justify      ^W Where Is     ^V Next Page    ^U UnCut Text   ^T To Spell
- Use the cursor key in order to move down just the line before
DIRNAME='dirname "$0"'. Type the two following line (use the enter key at the end of the first line) :
export OPENHAB_HTTP_PORT=8011
export OPENHAB_HTTPS_PORT=8444
Your screen should now display something like :
GNU nano 2.0.6                    File: start.sh                                    Modified

#!/bin/sh

export OPENHAB_HTTP_PORT=8011
export OPENHAB_HTTPS_PORT=8444

echo Launching the openHAB runtime...

DIRNAME=`dirname "$0"`
exec "${DIRNAME}/runtime/karaf/bin/karaf" "${@}"


^G Get Help     ^O WriteOut     ^R Read File    ^Y Prev Page    ^K Cut Text     ^C Cur Pos
^X Exit         ^J Justify      ^W Where Is     ^V Next Page    ^U UnCut Text   ^T To Spell
Save your modification by pressing
control-o, and thenenter. TheModifiedmention that appeared at the top right of the screen after your first modifications has now disappeared.Close nano by pressing
control-x.Your terminal window should looks like :
cal:~ admin$ cd OpenHab/
  cal:OpenHab callas$ ls
  LICENSE.TXT    conf        start.bat    start_debug.bat    userdata
  addons        runtime        start.sh    start_debug.sh
  cal:OpenHab callas$ nano start.sh
  cal:OpenHab callas$
Launching OpenHab for the first time
We are going to launch OpenHab for the first time, in order to check that our install is successful.
In the terminal window, type ./start.sh
cal:~ admin$ cd OpenHab/
cal:OpenHab callas$ ls
LICENSE.TXT    conf        start.bat    start_debug.bat    userdata
addons        runtime        start.sh    start_debug.sh
cal:OpenHab callas$ nano start.sh
cal:OpenHab callas$ __./start.sh__
Messages are displayed, wait until the "openhab>" prompt appears.
cal:OpenHab admin$ ./start.sh
Launching the openHAB runtime...

                             __  _____    ____
  ____  ____  ___  ____  / / / /   |  / __ )
 / __ \/ __ \/ _ \/ __ \/ /_/ / /| | / __  |
/ /_/ / /_/ /  __/ / / / __  / ___ |/ /_/ /
\____/ .___/\___/_/ /_/_/ /_/_/  |_/_____/
    /_/                        2.0.0-SNAPSHOT

Hit '<tab>' for a list of available commands
and '[cmd] --help' for help on a specific command.
Hit '<ctrl-d>' or type 'system:shutdown' or 'logout' to shutdown openHAB.

openhab>
- Without closing the terminal, open your favorite web browser and type the following url :
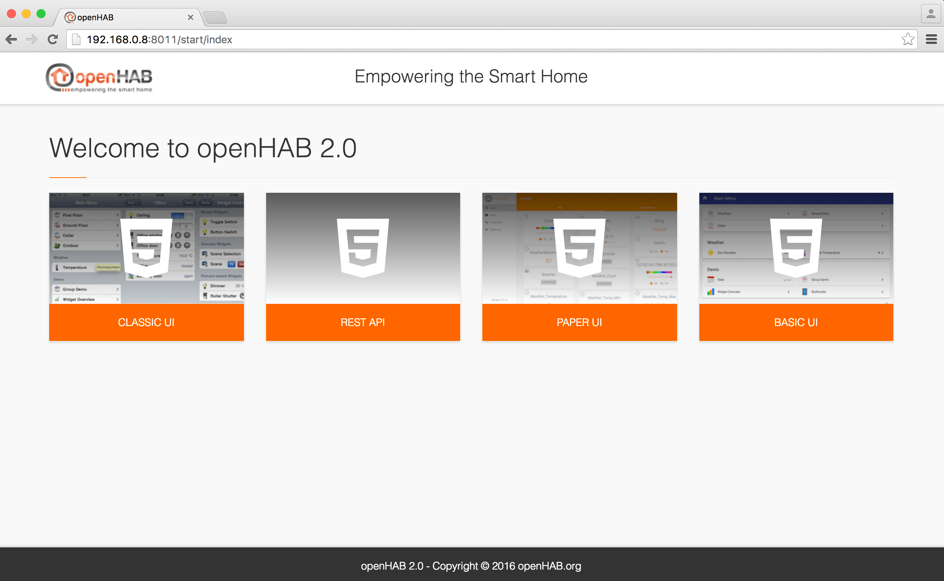
http://localhost:8011, you should see the openHab welcome screen.

Which browser should I use ?
Safari is supported by OpenHab, but the fact is that browser used by the OpenHab developer community - and by the owner of the ZWave plugin - is Google Chrome. I recommend then Google Chrome, as OpenHab 2 is in a beta phase.